
 |
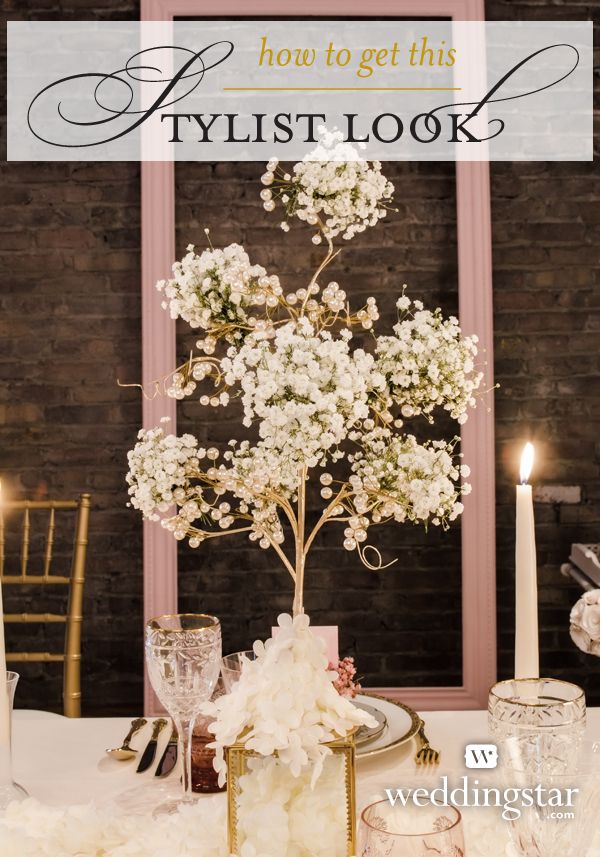
| This beautiful centerpiece was created by Kasia for the Pink Story Look Book by Wedding Star. It's a unique idea that you can create yourself-and we are going to show you how! |
Step 1: Gather Your Materials
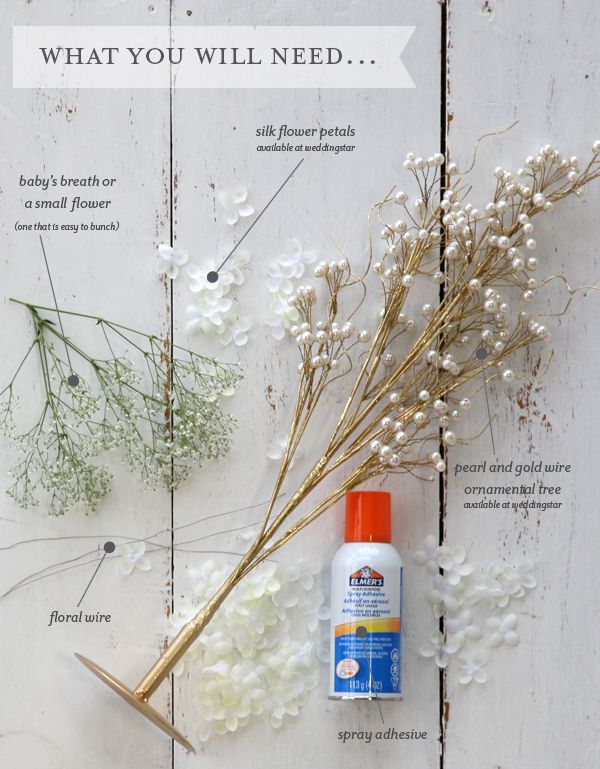
To achieve this look you will need:
http://thechicroomshop.weddingstar.com/search/ornamental-tree
Floral Wire
Spray Adhesive
Baby’s Breath or other Small Flowers
Floral Wire
Spray Adhesive
Baby’s Breath or other Small Flowers
Note: Baby’s Breath is ideal because it is easy to bunch without damaging the flowers, it is readily available at any florist and it tends to retain its appearance as it dries, which means your tree isn’t going to begin to wilt as the wedding progresses!
Step 2: Position Branches
Spread out the branches on your pearl and gold ornamental tree, they can easily be repositioned until you find a configuration you like.
Think of it a little like setting up a Christmas tree!
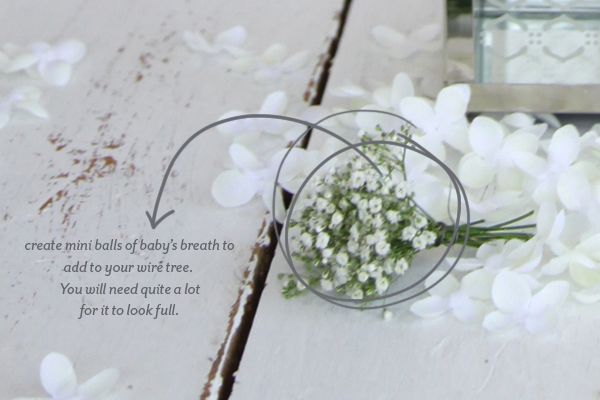 |
Step 3: Prepare Flowers
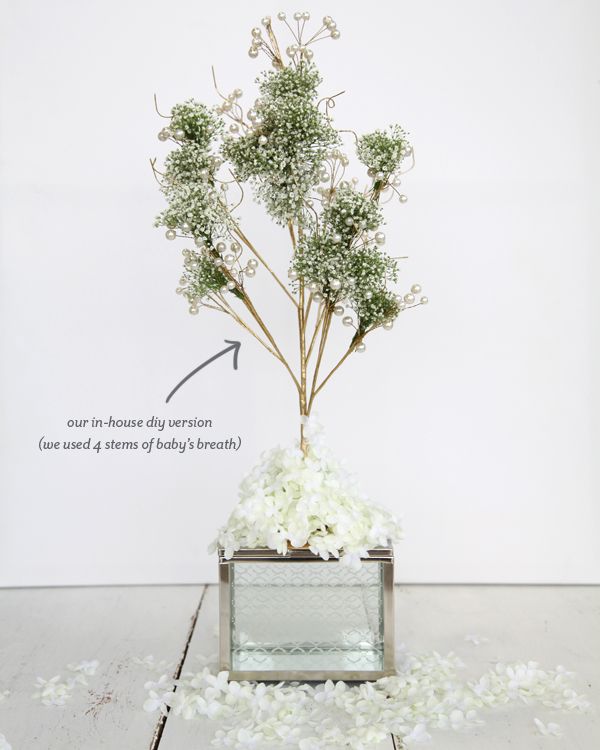
Create mini bunches of Baby’s Breath, or your chosen flower, using the floral wire to bind them together. How many you create and how full you make them is entirely up to you!
Step 4: Secure Flowers to Tree
Add as many of your miniature bouquets to the wire tree as you would like. You can secure them to the tree by wrapping a wire from the tree (one of the ones attached to a pearl) around the stems of your bouquets or by using the floral wire.
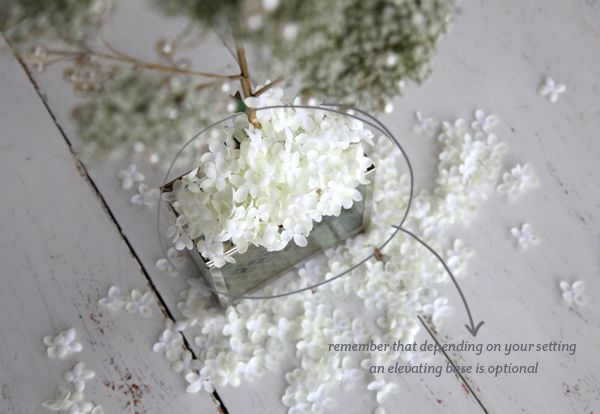
Step 5: Elevate Your Tree
Once you are happy with the configuration of your tree, you can choose to add a little more height. Choose a box or other flat-topped item that suits your wedding style. We used our http://thechicroomshop.weddingstar.com/product/decorative-glass-box-with-mirror-base
Step 6: Placement of the Petals
Spray the base of the ornamental wire tree and any surface you want covered with the spray adhesive. Immediately sprinkle the silk petals on the glue. Once your first layer of petals has been placed you can spray again to create another layer if you want to build them up as shown in the photograph. How many petals is entirely up to you.Note: Although we found that the spray adhesive is quite accurate and clean, you should be sure to cover any surface you don’t want to damage before you begin spraying.
Step 7: Setting up Your Tree
Once your tree has arrived at its location for the wedding, sprinkle some petals beyond the adhesive for a nice natural look.
Contributors:
Produced and Styled by Kasia Juras-Azcurra, Prelude to a Kiss Wedding Stylist: preludetoakiss.ca
Photography by Mugshots Photography: mugshotsphotography.ca
Produced and Styled by Kasia Juras-Azcurra, Prelude to a Kiss Wedding Stylist: preludetoakiss.ca
Photography by Mugshots Photography: mugshotsphotography.ca
No comments:
Post a Comment